
In this tutorial, we will show how to create a LowPoly image in GIMP. Images with lots of color work best for this project.
To start, you will need to open GIMP and open your image. The one I used for this tutorial can be found here.

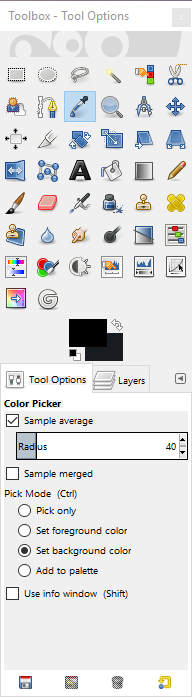
Next, select the Color Picker and select "Sample Average" and "Set Background Color" as shown below. Set the "Radius" option to about 40 for this image.

Next, select the "Free Select" tool and draw your first triangle on the picture. I like to start from a corner. If you are not familiar with the free select tool, do not click and hold to draw your lines! Just click once where you want to start, and then click again at every corner until you get back to where you started, then click the first yellow dot.

If you made the triangle correctly, you will see black and white dots moving around it like this.

Next, open the color picker tool and click the middle of the triangle.

Then press CTRL+X and the triangle will be replaced with a solid color.

Repeat these steps until the image is completely covered. Be careful not to leave blank space between the triangles. To be safe, when I do it I always overlap them slightly.

If you want to skip the hassle, you can follow this link and I will convert images for you. https://www.fiverr.com/matthew20218/create-lowpoly-art-from-your-picture
No comments:
Post a Comment